Hi all!
Sorry its been so long since my last post, life has been busy.
You might have thought there's just not much going on in the garden what with it being the middle of the winter and all, but here in Southern California zone 9b that luckily isn't really a problem- the weather is so mild that there's always something growing!
I have still been taking photos of the garden and harvests, just haven't had time to post them until now, so here are a few choice images from the past few months along with some learnings and tips:
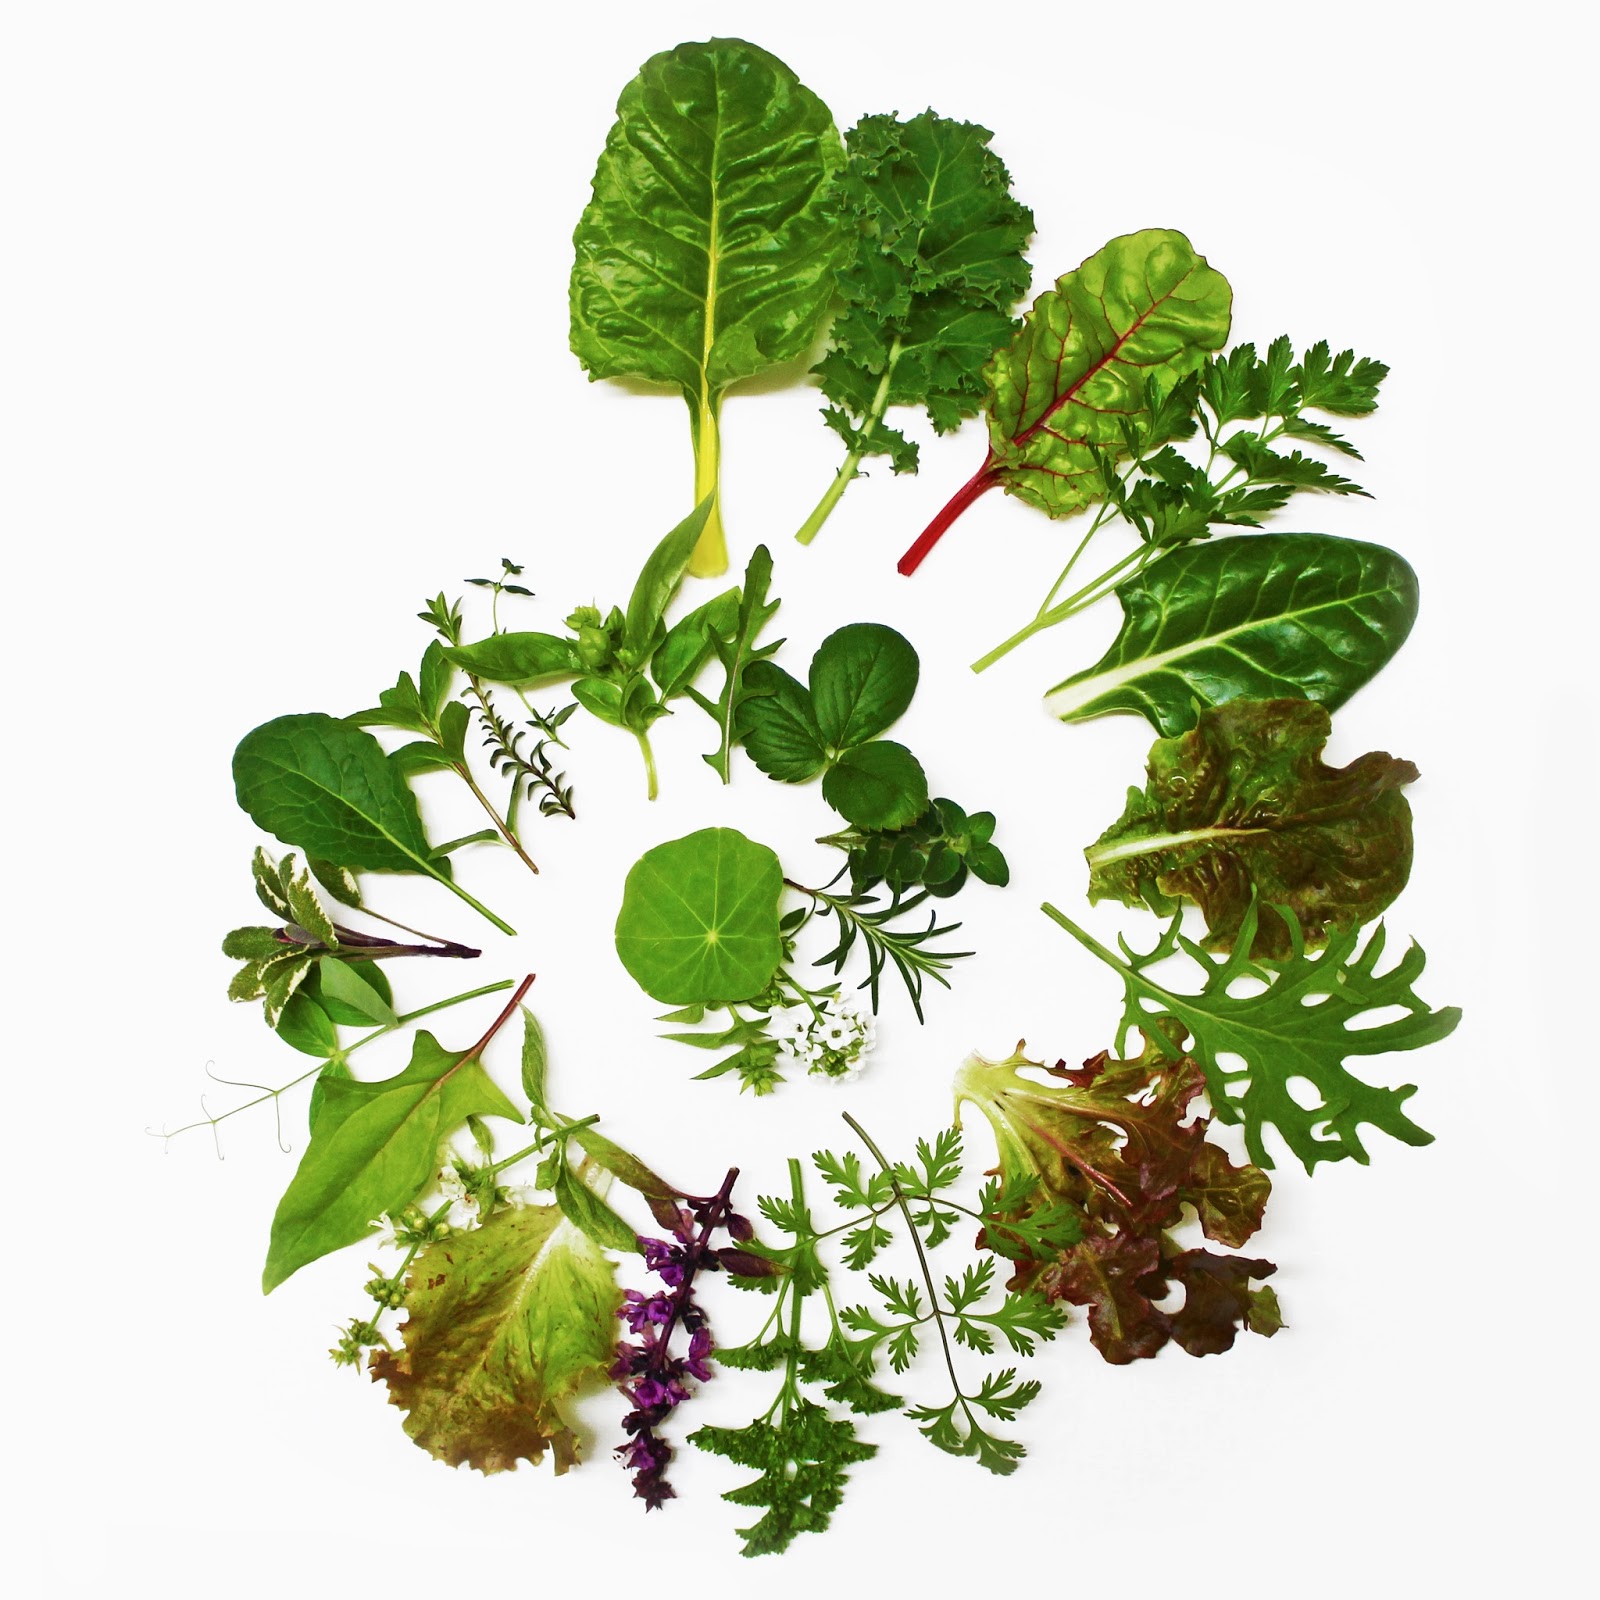
Here's a nice shot of part of the front porch garden. It's small but I pack in a lot - in just this one photo you can see a variety of different lettuces, arugula, cilantro, parsley, dill, peas, kale, nasturtiums, alyssum, and a lime tree! (as well as a few succulents that haven't been sacrificed for the space to grow edibles... yet)
You'll also notice a new addition - the planter box on the railing! There are 2 actually, the other is out of frame, and they are the same as the ones on the side porch that I used for strawberries (cedar containers from Home Depot zip tied to the railing through holes I drilled in them). The lettuces are actually doing better than the strawberries in this type of container, and they are one of the best additions to my tiny garden ever! Here's more about the lettuce...
As I said- best addition to the garden ever- possibly with the exception of herbs.
Its my first time growing lettuce actually, and its been so wonderful being able to step out onto the porch and pick a handful of lettuces, arugula, baby chard, baby kale, and herbs for a salad any time I want! It never hurts to top off the greens with some chopped carrot, radish, mushrooms, or grape tomatoes either! Here's a few of the many salads the garden has provided so far:

I'm not totally sure what all the varieties I got were, I bought them from starts and some were in a mixed pack simply labelled "fancy mix" but I do know I have some romaine, red sails, and red oak leaf. I'm using the technique of simply picking off the outer leaves whenever I harvest and they are planted very closely so none have actually formed true heads but that's just fine with me for my purposes. I also got some arugula starts and grew some spinach from seed because I love my greens and I love variety. They all seem to do great in small containers and don't seem to need a whole lot of room or root space- all they seem to ask is to be watered frequently and they prefer cool weather.
I notice about half of the varieties started to bolt when we had some warmer temperatures for a few weeks, so I decided to let them keep going and save the seeds, but I am able to continue harvesting the leaves as they have not yet turned bitter. My spinach and cilantro also decided to bolt from the warm weather and much of my basil started blooming as well. The romaine and the curly lettuce in the bottom photo did not bolt yet, they seem to be able to better tolerate warmer temperatures.
I definitely recommend growing lettuces and other leafy greens if you are short on space or growing in containers like I am. I might even recommend growing your lettuce in containers even if you have a yard or raised beds, and raised up if possible like these are, as it gives the snails and slugs less access and they seem to love to munch on the lettuce if they can get to it. The chard and basil and baby pea shoots are still their favorite though. Speaking of peas...
So another new favorite of mine is snow peas. Oregon Sugar Pod II to be specific, I believe these are from Seeds of Change but you should be able to find this variety with many seed suppliers. They are doing very well growing in containers, which I wasn't sure about but am glad I decided to try. They grew quickly, are nice and robust, and are fairly prolific And they taste great of course. They also survived the heat wave, I can't say the same for the snap peas...
I had high hopes for the snap peas, they were doing quite well for a little while and I even started being able to harvest from them, and they tasted delicious! But then we had a heat wave and they got a little sad looking... and then we had ANOTHER heat wave...

It can't be all successes and ample harvests in the garden all the time. Its often seems more like 50/50 success vs. failure, or maybe 75/25 once you learn what works for your area and do some research and gain a little experience. There are pests, and there are diseases, there's also mistakes, and then there is weather. Now I'm not going to complain about getting several weeks of 80 degree weather in the middle of the winter, it is part of the reason I live here in the first place, but my sugar snap peas sure didn't like it. These photos are the same plants as in the previous photos, but after some mildly hot weather and then some very hot weather. A few survived, most did not, and I learned that sugar snap peas are not heat tolerant at all and might not be the best choice for my climate.

Some more "learnings" as I like to call it (not failures, just an opportunity to learn, right?), are that the strawberries are not totally happy in their current living conditions. I have a feeling I planted them too closely, that it would have been better to put maybe 3 plants in the size container I have rather than 6, as they have not been producing well and have only had very tiny fruit. It is also early in the season and some varieties like warmer weather or fruit at different times of the year, and sometimes the plants take a while to get established, so I will wait and see if things improve. I have still gotten fresh, homegrown, pesticide free strawberries out of my garden, just not very many and they are very very small!

Ah herbs!!! I can't say enough good things about them - easy to grow, grow well in containers, can be grown inside or outside and more or less in sun or shade, nutritious, add so much flavor to foods, versatile, beautiful... Pictured here is some genovese basil grown from seed, some cilantro grown from seeds I planted mixed in with some chives growing from seeds that volunteered (the chive plant in the pot above it bloomed and the seeds fell into a few other containers and started growing), mint springing back to life (after the older growth died off either from weather or maybe as part of its natural life cycle), and a harvest of parsley, cilantro, oregano, mint and basil.
I recommend everyone grow herbs as it is so much cheaper to grow them than buy them fresh - fresh herbs are my favorite and a bunch of herbs that are cut and will spoil quickly is around the same price as a living plant that will keep growing and give you many harvests, so why not get the most for your money? Also if they are conveniently right there on your windowsill or just outside you are a lot more likely to actually use them, and they make everything taste so much better, not to mention the antioxidants and nutrients they provide. I add them to lots of foods you might not think of - most people add herbs to Italian food and possibly some rosemary to roasted potatoes, etc - but I add fresh parsley on top of macaroni and cheese, parsley or chives on top of scrambled eggs, add cilantro and basil to salads and takeout thai food and salsa, fresh dill to ranch dressing, thyme to baked chicken or potatoes or beets, fresh oregano and basil with leftover spaghetti noodles and a drizzle of olive oil and some salt and pepper can make an easy snack or meal, all kinds of herbs go into my omelettes, I could go on...
Again its not all sunshine and rainbows all the time, even with herbs - I had a nasty case of spider mites take out most of my basil (the basil that the snails didn't decimate, that is!). If you ever notice little cobwebs on your plants and yellowing leaves look very closely... if you see little red specs, then I'm afraid you've got spider mites my friend. I recommend spraying the plant down with water to knock them off, and possibly getting some beneficial insects like ladybugs to eat them. We just had a crazy storm with 3 days of pelting rain, I'm hoping that will have done the trick.

Some more old favorites, my trusty chard! I couldn't count how many leaves I've picked off these plants and they just keep chugging along and producing more. They don't seem to be affected much by the weather, and they do great growing in containers (though they are more petite than ones I've seen growing in raised beds or in the ground). They suffer snail damage from time to time but thats the only issues I've had with them so far- knock on wood. They're just so beautiful too! I particularly love the one with the yellow stems, and the one with red veins is very striking.

Some new beginnings... here's just a couple of new baby plants I've got going, some lucinato kale grown from purchased seed on the left and a cherry tomato grown from seed I saved myself on the right. I also sowed some spring onions/scallions that just sprouted, and more snow peas. I have 4 new red russian kale plants that are about the same size as the baby lucinato kale right now as well, and some bell peppers going in small pots like the tomato. That reminds me I should take advantage of this wet weather to sow some basil seeds and more cilantro out in the garden...
Well that's about it for now!
Feel free to leave a comment about what you've got growing in your garden or if you have any questions.
Happy gardening!
.JPG)


